When you listen to music, do you really get to hear the song in the way that the writers, players and studio people do when it is first created? Probably not. The fact is that all stereo systems change the sound in subtle (and sometimes not so subtle) ways. They may be heavy at the bass end – think of all the cars that go by with their subwoofers blaring. If you listen on your cell phone you’re hearing it through tiny speakers. Forget about picking up the bottom end of the music. You’ll have some improvement listening through decent earbuds, which is why I suggest that when checking out songs. But all stereo systems alter the sound to some extent. When you’re mixing in a recording studio you have to take this in to consideration. The best way to do this is to make sure the monitors you are mixing on have a flat EQ response. In addition to the speakers themselves, where they are placed in the room will also effect what you hear (this is also true when you set up your home stereo). Are the monitors placed in a corner or against a flat wall? What type of surface is behind them – drywall, blankets, sound absorption panels? When we changed the placement of our Yamaha NS10M Studio monitors the sound that we hear also changed. They were placed further away from the listening point and sound panels were placed at equal distances beside and behind the monitors. The idea was to get a wider stereo feel and to equalize the reflection surfaces around the speakers.

We use several monitor systems during the mixing process, but I like using the Yamahas for the initial mixing. For quite a while you couldn’t see a picture of a recording studio without seeing a pair of NS10s by the mixing console. Some people love them and some hate them. I like them but you have to know their strengths and weaknesses and use them accordingly. If you’re interested in more of their history, here’s an article from Sound On Sound that has a good discussion of their background:
http://www.soundonsound.com/reviews/yamaha-ns10-story
Whenever the placement is changed, that means it’s time to redo the room tuning for them. The way this is done is by using a piece of equipment called a real time analyzer. A real time analyzer sends pink noise through your speakers that will be picked up using a microphone and can be seen on a graph showing available frequencies and how much of that frequency is being broadcast through your speaker. You’ve probably heard of ‘white noise’. It’s sounds like static and is usually used to mask sounds in a room. Pink noise is similar except that it broadcasts all frequencies coming out of the speaker. Your goal is to make the pink noise have as flat an EQ as possible. You will accomplish this by running the sound from the mixing boards through a dedicated EQ before it reaches the monitors. You have to be sure that the mic for the analyzer is positioned in the spot where you’ll be sitting – near field monitors have a tight listening field and accuracy matters. The sound from pink noise will fluctuate, so you have to study the levels while it is running then review the peak capture when you turn it off. The picture below shows the running sound and peak capture for the NS10s before the EQ going in to the monitors is set up.

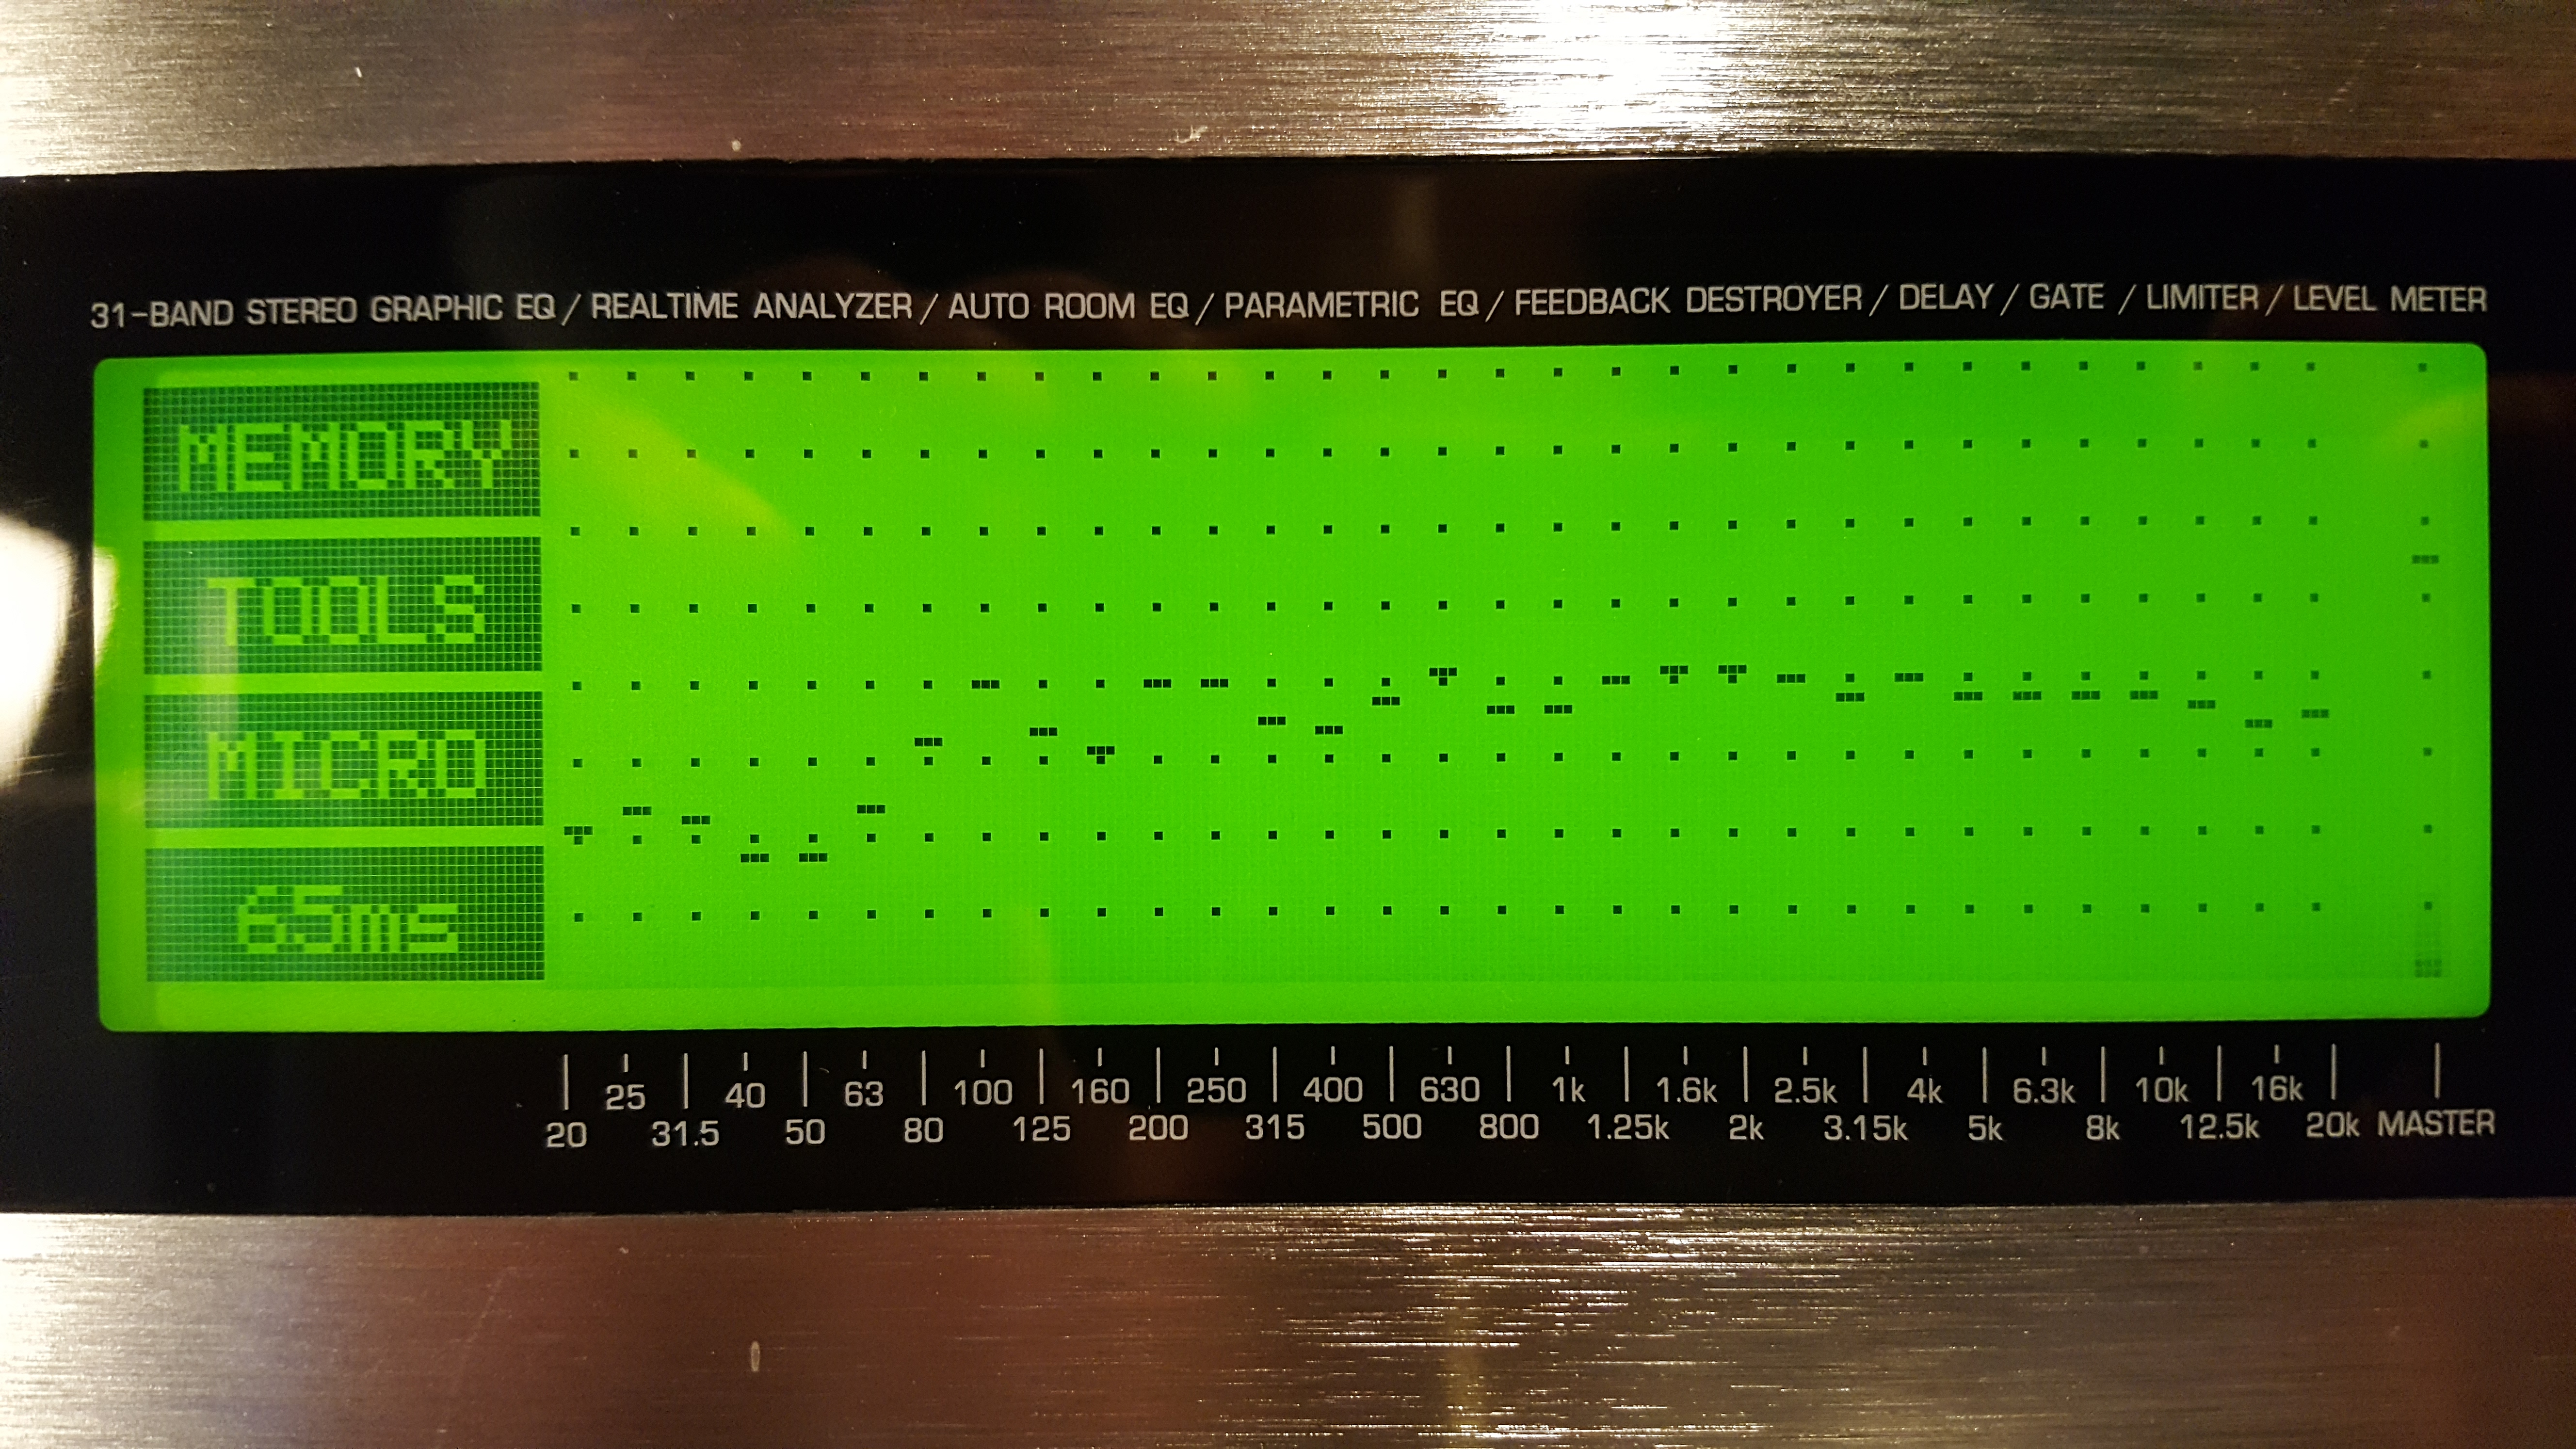
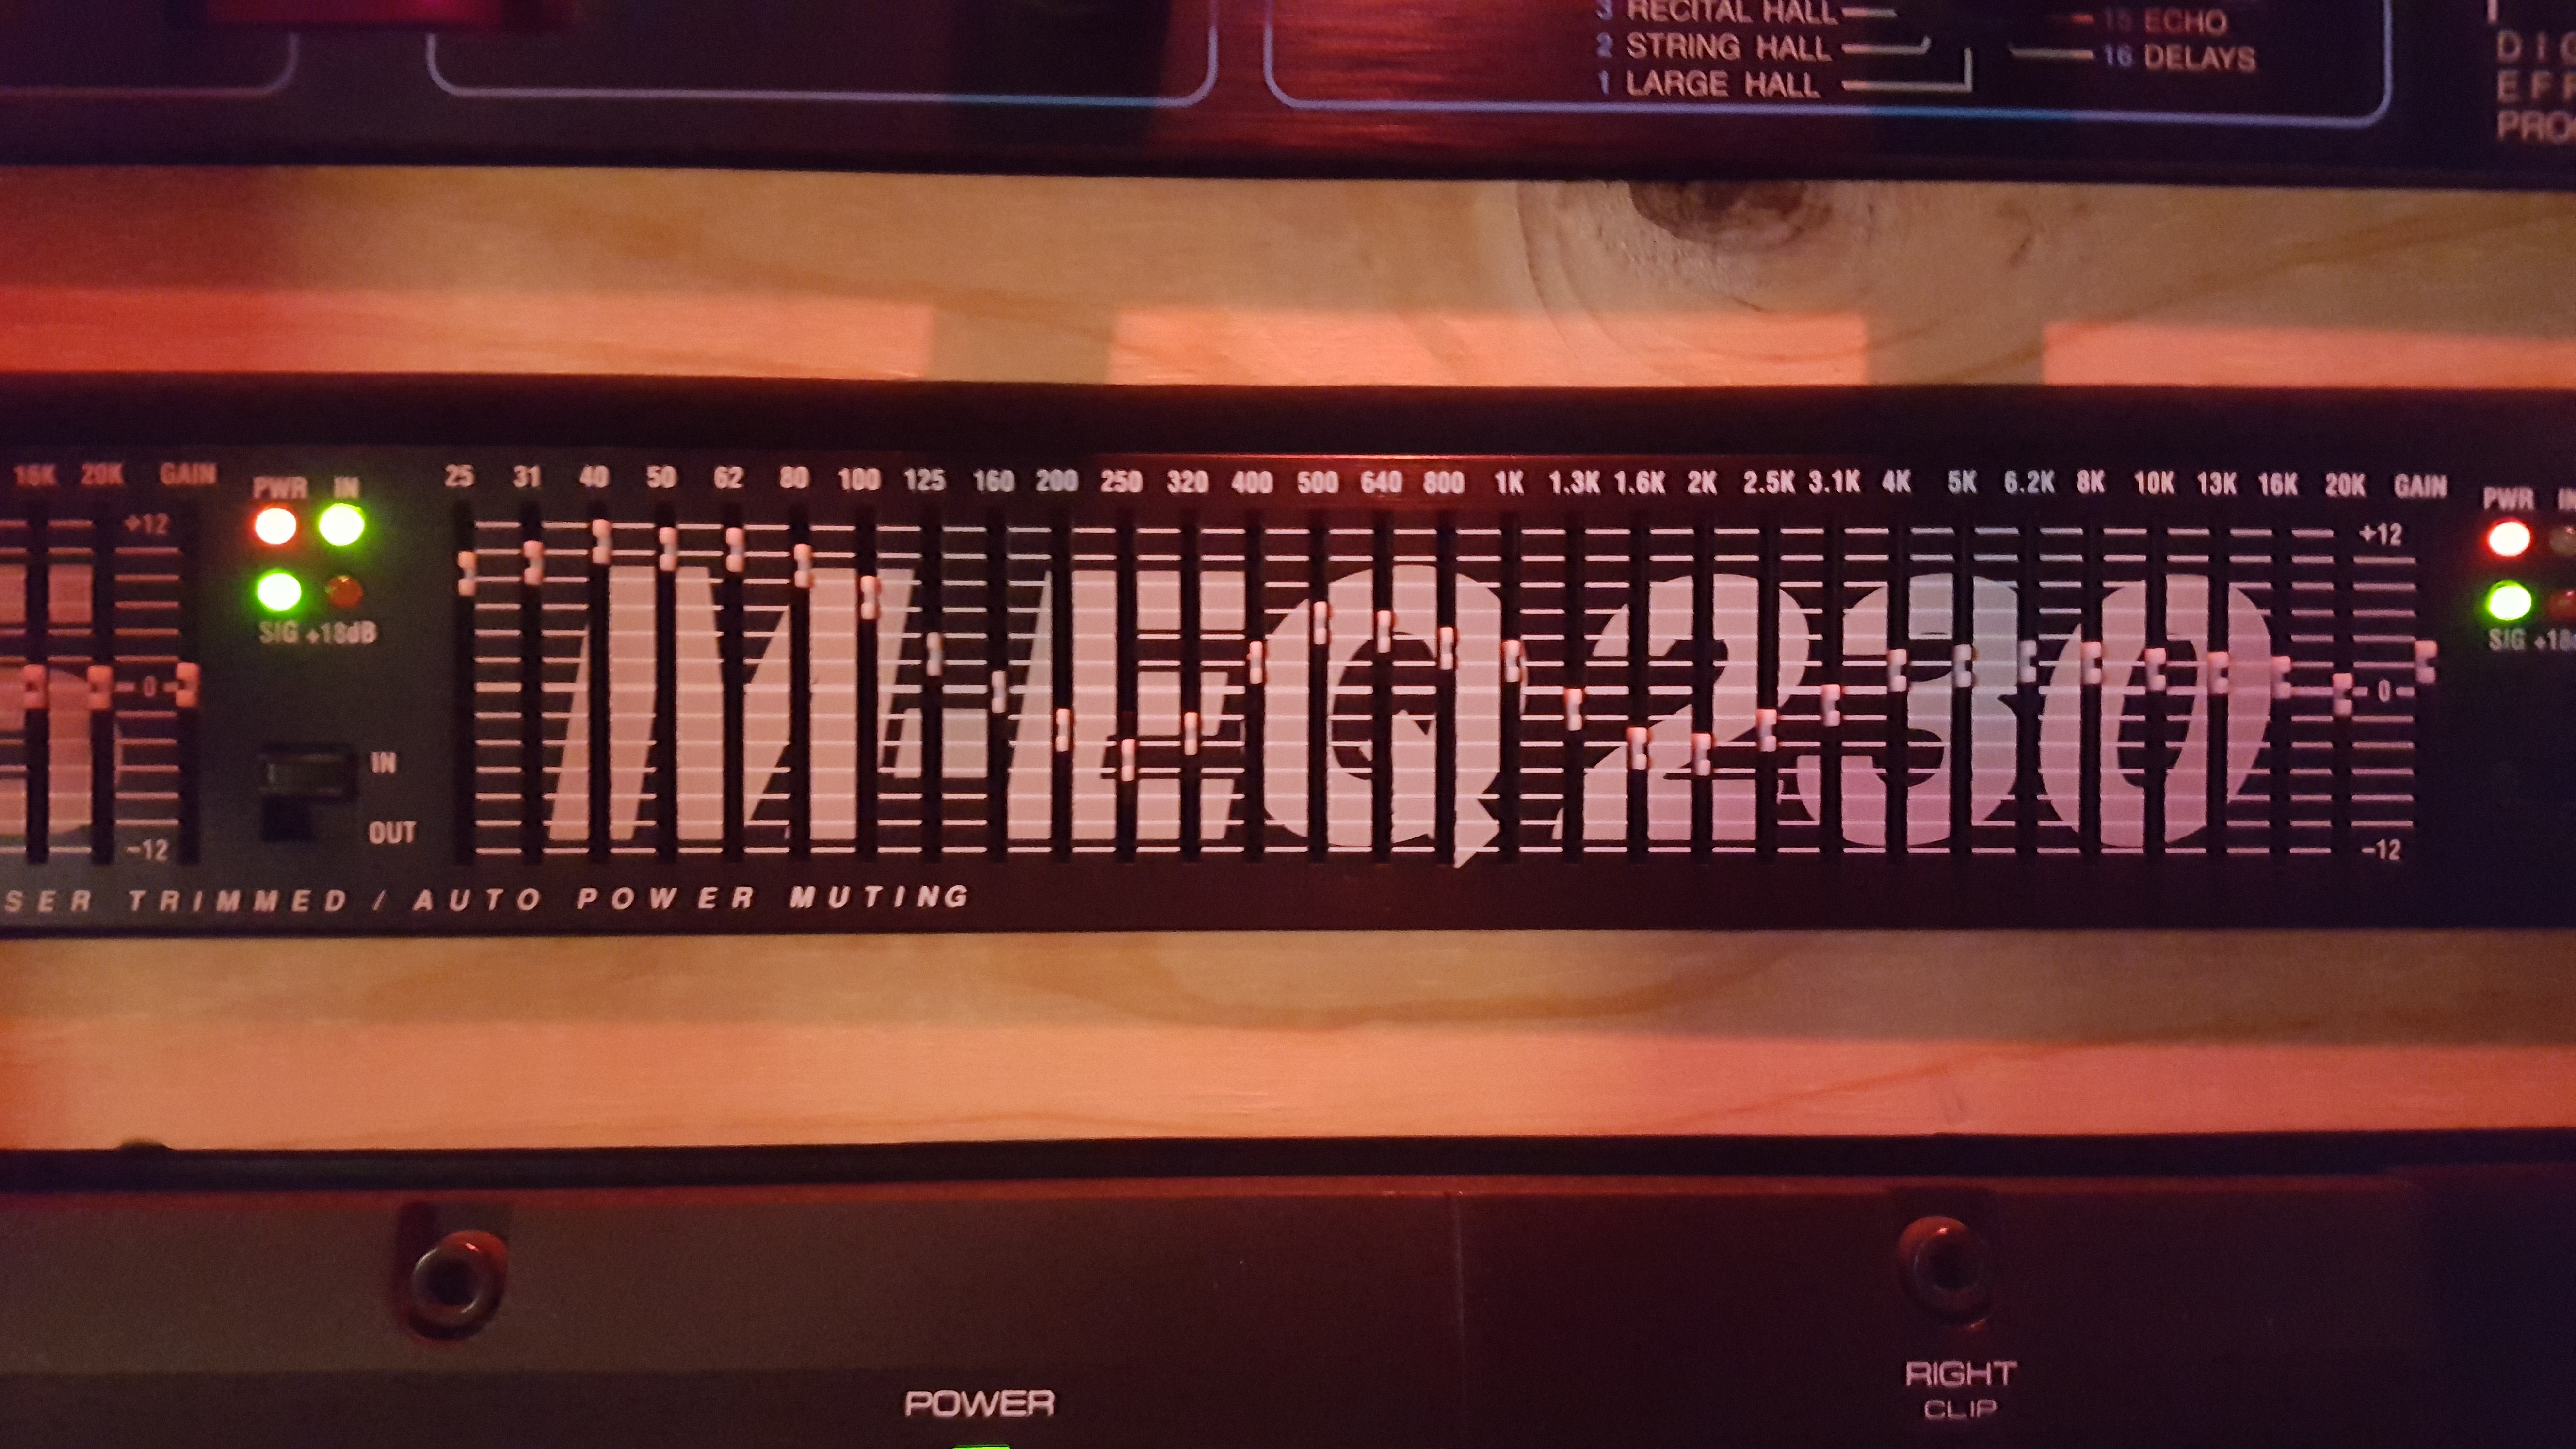
NS10Ms tend to be weak at the low end but depending on the monitor placement you may have peaks and valleys on frequencies throughout the spectrum. The next step is to raise or lower frequencies on the EQ going to the speakers to balance what you see on the graph. The more frequencies you have on your EQ the more accurate you can make the adjustments. The process takes a while since when you adjust one frequency it effects the frequencies around it. After the adjustments are made the final EQ setting looked like this:
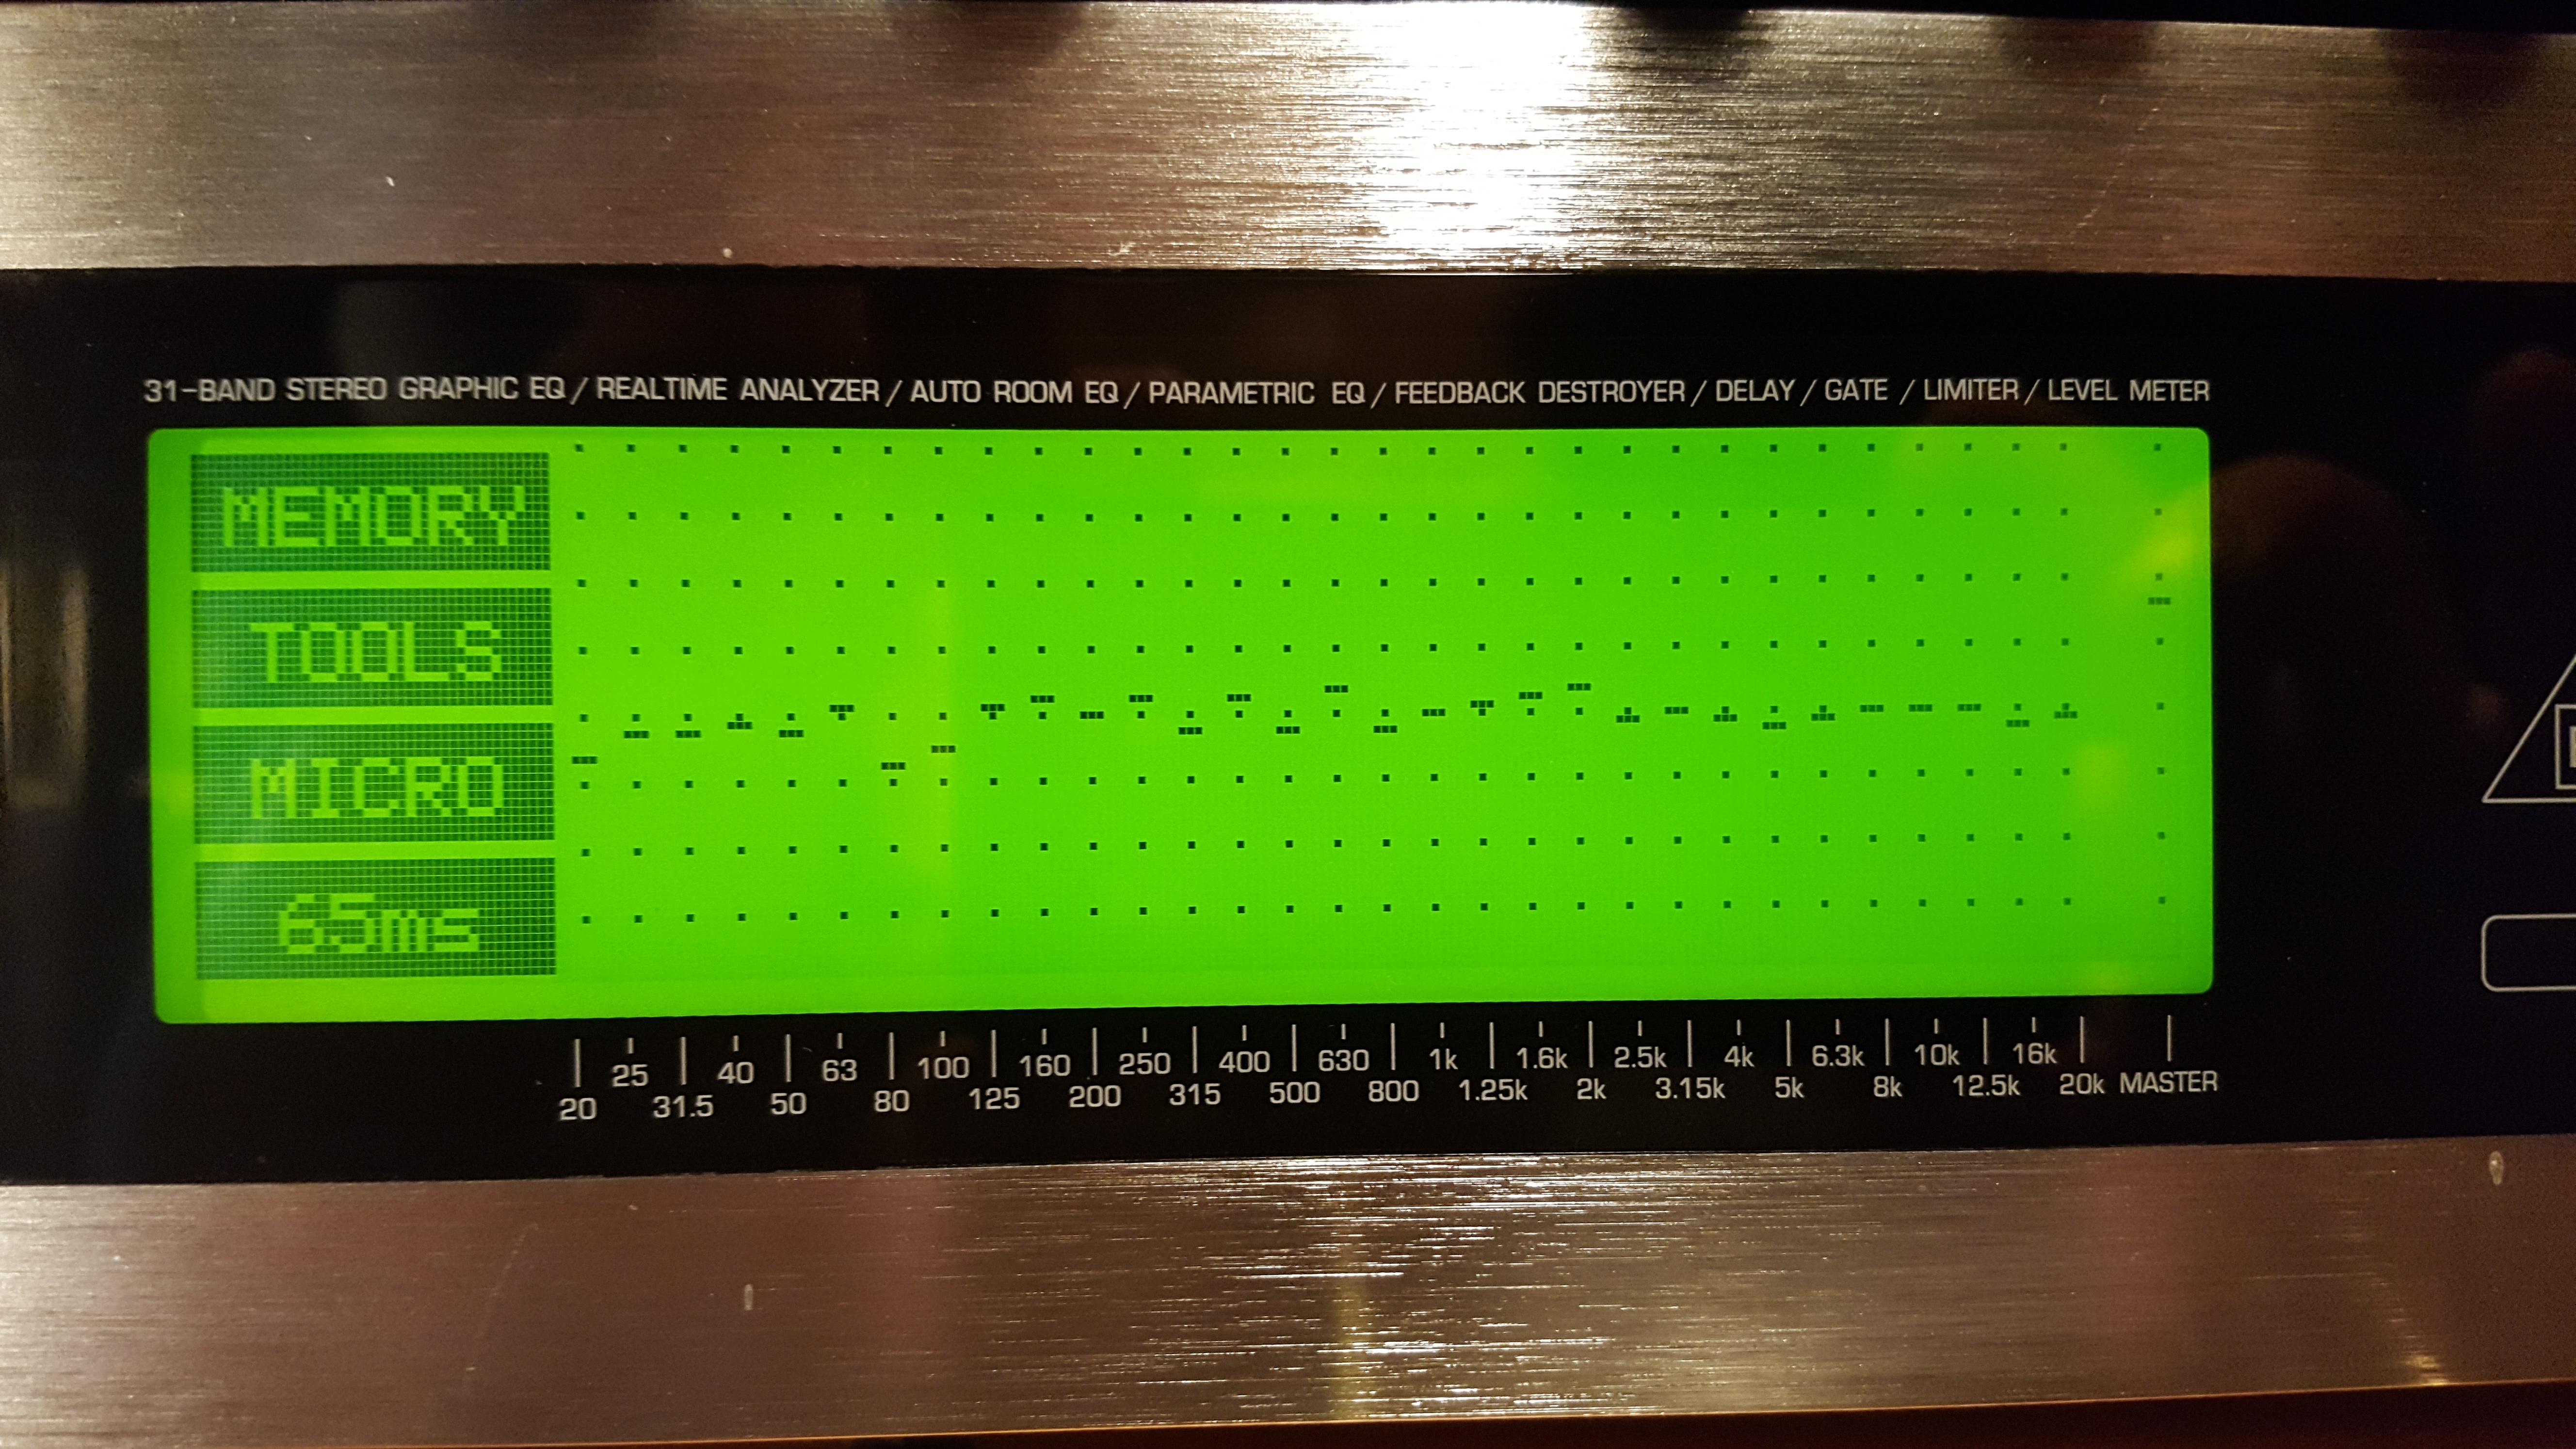
Here’s a snapshot of the running sound afterwards. The pink noise does fluctuate and will not look flat at any one particular second, so you want to let the sound run for a while and then look at the static capture lines (the horizontal lines at the top of the frequencies seen here) when the pink noise is turned off.
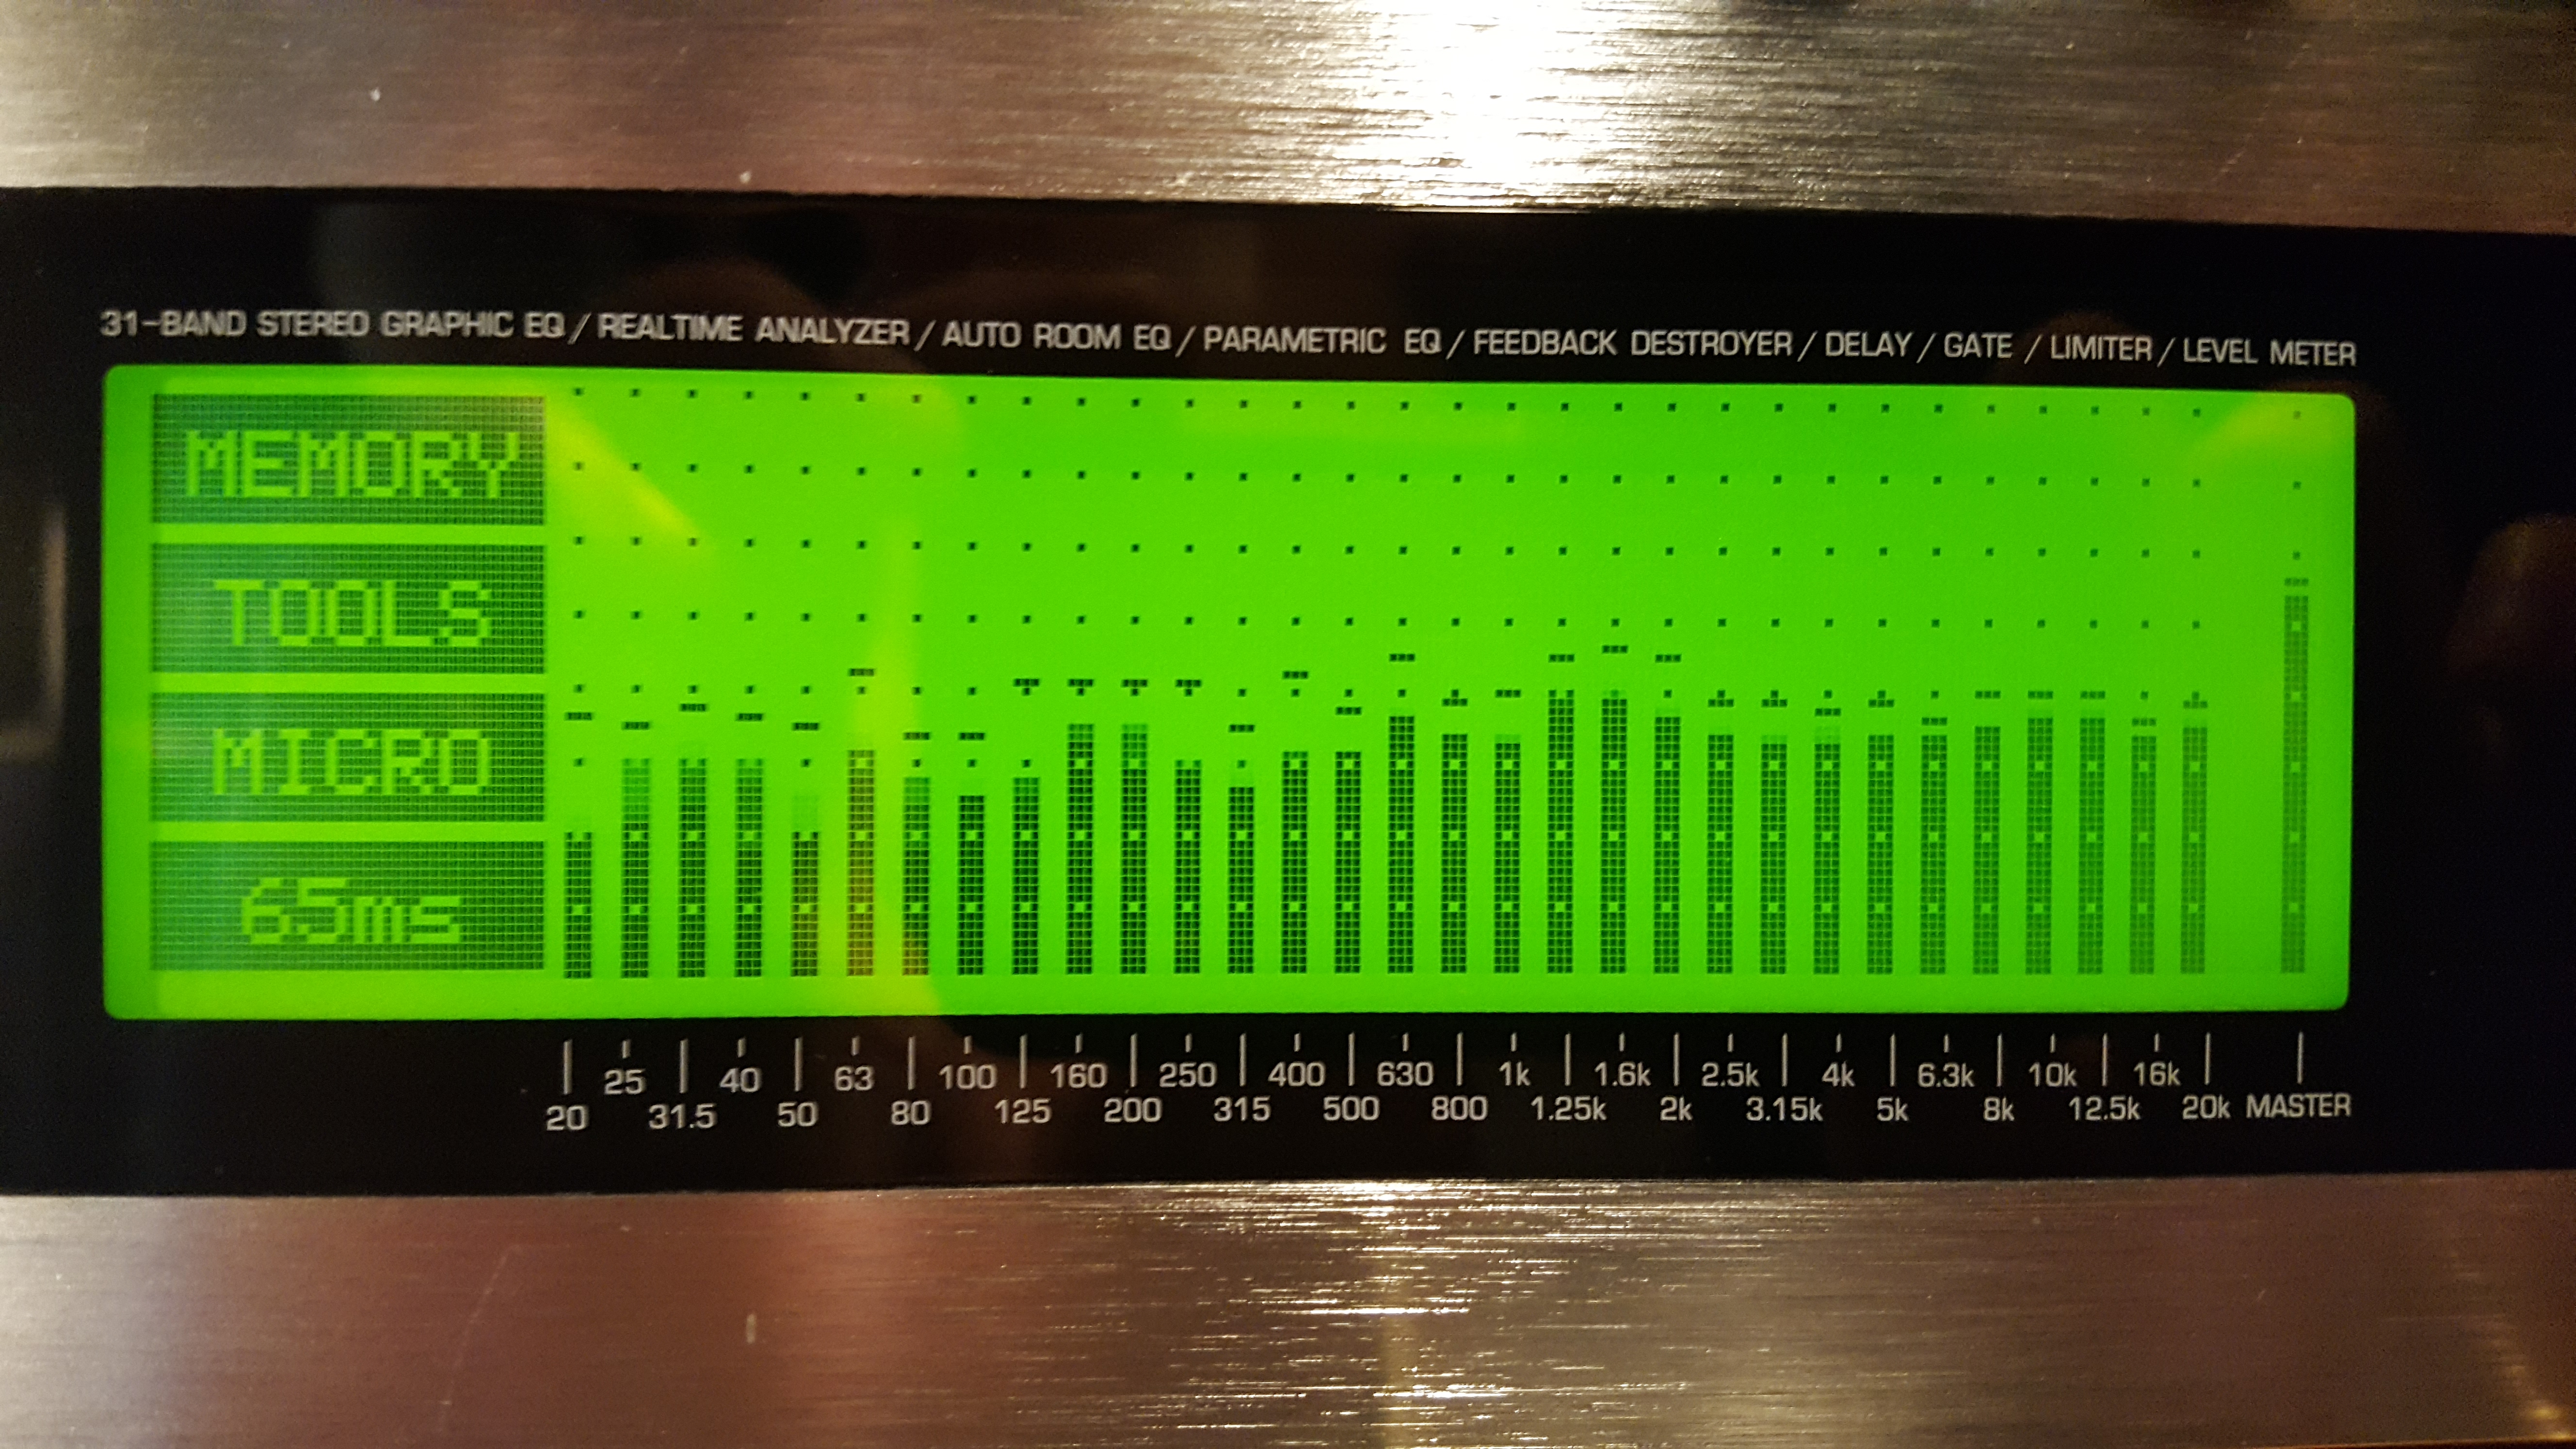
The final shot of the peak captures gives a good representation of where we ended up:
I’m pretty comfortable with the flatter EQ at the end of the process. One other tip is to make sure you are hearing equal levels from both speakers so you don’t overload one side when you’re mixing. The real time analyzer should let you get actual equal volumes for both sides. I have some volume hearing loss in one ear – the result of playing in bands for a lot of years (fortunately it is not frequency loss). To check on this take one channel of the song you’re mixing and run it straight down the center of your stereo field while sitting in your perfect center listening spot. If it sounds like it’s coming more from one channel or the other, make the adjustment on the volume of your reference amp. It’s at the end of the sound chain so it equalizes volume for your ears without effecting the balance in your actual mix. I also check the final mix of songs through the Real Time Analyzer so I’m using sight as well as sound to get the frequencies where I want them.
After the NS10 mixing is completed we’ll make any mix adjustments and also do the mastering through the higher end monitors set up in a different listening station. It’s always important to take your time, ‘put the mix down’ and come back to it later for review to get the best results possible. A great song will shine through no matter what, but a great mix will always improve your song.
